The basics of exposure for bird photography
Published on 2021, July 25
Hi, I’m Samuel, a bird photographer based in Helsinki (Finland). With the experience I’ve accumulated through the years, I want to help you improve your bird photography, and what a better way to start than a free article on exposure! Let’s get started!
In this article, I want to give you guidelines for exposure in bird photography. The tips I give range from general principles to detailed setting suggestions, and I believe there should be something for everyone in them, whether you’re a beginner or an experience photographer. I illustrate my presentation with my own images, so you can precisely see what I’m talking about.
The process we’ll follow starts at the end: what do I want the image to look like? From this idea, what I call the “desired outcome”, you’ll make informed choices, through the camera settings you select, to create the image as you envisioned it.
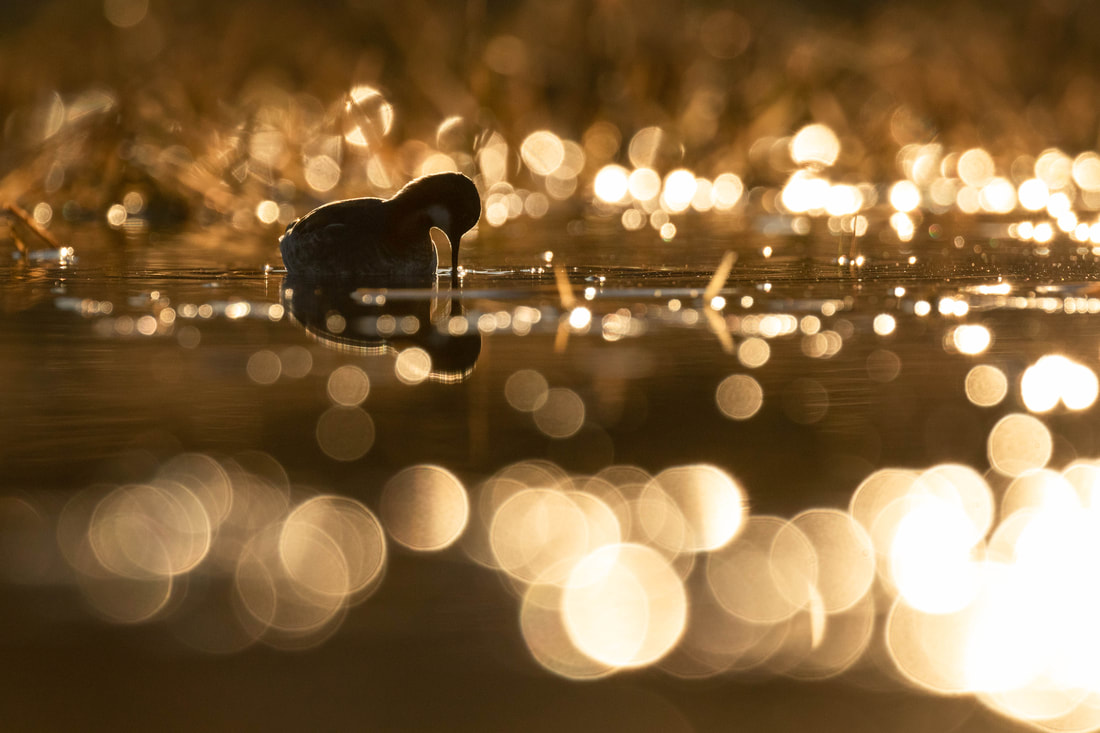
Red-necked phalarope - 1/6400s, f/6.3, ISO 500
Your goal
Your goal, as an artist, should be very simple: I want to create pleasing images. Of course, “pleasing” is subjective, so I’d like to believe that we photographers create images for ourselves, first and foremost. The main rule should then be “do whatever you want”. Nevertheless, we also want to show our work to others, we want them to like it and thus validate our choices… maybe so that they buy prints, publish our images, or simply enjoy them. Even if rules are meant to be broken, they exist for a reason, and most image viewers can agree on the qualities of a great photograph. Therefore, it’s good to conform to the rules, to a certain extent, when forming the desired outcome in your mind.
I believe that creating pleasing images requires two steps: shooting, and editing (post-production). Ideally, the second step wouldn’t be needed, but the immense majority of images need a bit of a touch to reach their best potential (some purists may disagree with this statement, and that’s fine). In this article, we’re only focusing on the first step, field work. If you want to learn more about post-production, please check my 1-on-1 tuition page; I’ll be happy to share my knowledge on the topic with you.
When shooting with a desired outcome in mind, you should have two secondary goals: capture the material needed to achieve your desired outcome, and minimize editing. Editing can take a lot of time and energy, and can be detrimental to image quality, that’s why you should aim to keep it at a minimum. Material you need to capture may include critical sharpness, plumage detail and dynamic range, while minimizing editing may require a low noise level and an exposure as close to the desired outcome as possible.
Let’s see how we can achieve all this.
Table of contents
UNDERSTAND: the triangle of exposure and your autofocus system
MEASURE: light, and how metering and shooting modes influence your shooting
CONTROL: field craft that lets you be more reactive
BALANCE: high contrast scenes, and how to tame them
MEASURE: light, and how metering and shooting modes influence your shooting
CONTROL: field craft that lets you be more reactive
BALANCE: high contrast scenes, and how to tame them
UNDERSTAND
The triangle of exposure
Shutter speed, aperture, ISO sensitivity: as a photographer, you need to understand the triangle of exposure, which is a representation of how much light reaches your camera’s sensor. In bird photography, the main challenge is to bring enough light to the sensor while maintaining sharpness on the subject.
You can use a slower shutter speed, but you risk introducing blur, be it motion blur (if the bird is moving) or shaking blur (if you are moving ever so slightly). Image stabilization on lenses and bodies helps with the latter, but it’s not a magic solution. That said, I’ve been surprised by what modern cameras could achieve. The old wisdom of “no slower than the inverse of your focal length” is no longer valid; I have achieved sharp handheld shots at 400mm and 1/200s! It’s worth experimenting.
You can use a wider aperture, but in most situations you will already use the widest your lens allows. In my experience, this is the parameter you have the least control on.
Finally, you can increase the ISO, but this brings more noise to your image. How far you can go depends on your camera. As an example, I noticed that ISO 3200 was the hard limit for my Canon 7DII. While I managed a few satisfactory images at that level, going beyond never yielded anything usable. The problem was not so much the noise itself, but the resulting loss of sharpness. Higher-end full-frame cameras should allow you to go further with no problem at all. Again, it’s worth experimenting

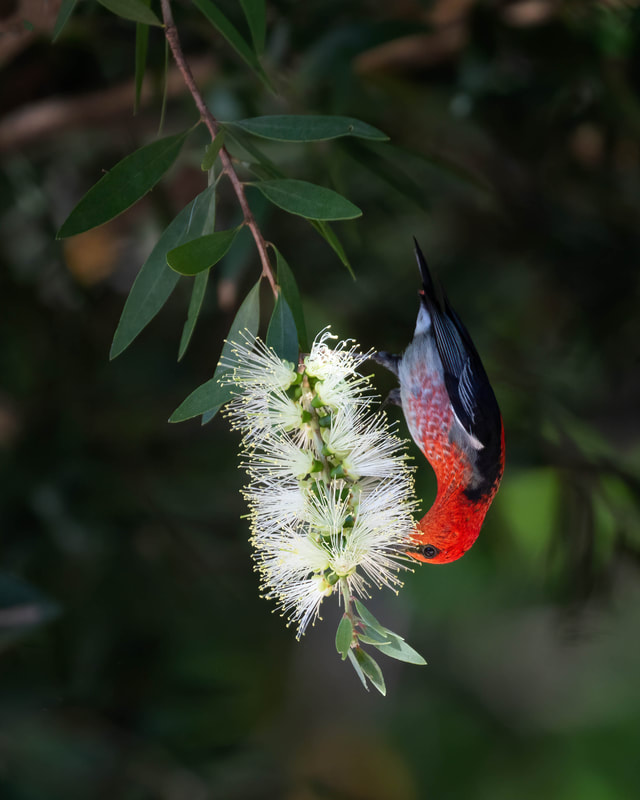
Stitchbird - 1/250s, f/5.6, ISO 3200. Handheld image, at the highest ISO my camera could handle. 1/250s is a rather slow shutter speed, but with a good technique and a bit of luck, it's still possible to create a great image.
Quality of light
Besides the triangle of exposure, and the amount of light that reaches a camera’s sensor, the quality of that light is of paramount importance. Typically, soft light creates more pleasant images than hard light, because bright areas are subdued, shadows are not so harsh, and colours glow more.
For bird photography, there are two great kinds of soft lights: “golden hour” and overcast.
“Golden hour” refers to the moments right after sunrise, and right before sunset. It doesn’t necessarily last one hour, it can be shorter or longer (that depends on season and location), but it’s characterized by the sun being low on the horizon, thus casting a soft, warm (“golden”) light on the landscape. Colours are vibrant, and as a bonus, it’s generally the time when wildlife is the most active! Oh, and you can include the sun or its reflection in your frame without blowing it out.
Overcast days are nice too, because the clouds act as a giant softbox, casting soft light over the scene even in the middle of the day, thus lengthening potential time in the field. It also enables photography at locations that don’t receive light during golden hour, such as many forests.
Both golden hour and overcast lights have a downside: even though the quality of light is superior, the quantity can be limited. It’s the same for “blue hour”, which refers to the moments right before sunrise and right after sunset: quality of light is great, but there really isn’t much of it, which makes it a challenge both for the autofocus and the sensor. That’s why it’s important to understand the triangle of exposure (cf previous paragraph) and to use it to your advantage.
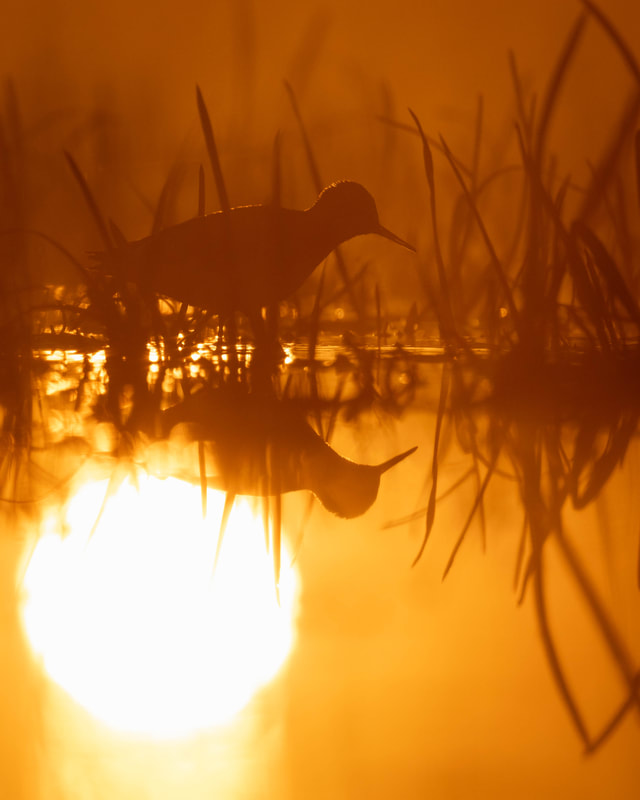
Wood sandpiper - 1/8000s, f/6.3, ISO 160. With the sun so low on the horizon, I could include it in my frame.
MEASURE
Now you know the main settings you have control of, and their side-effects. Let’s see what information you can use to guide your choices.
Metering modes
Your camera has a light meter that measures how much light reaches the sensor, depending on the settings you have chosen. You can see the result on the exposure level indicator that is located in the viewfinder, usually at the bottom or on the side. 0, in the middle, is the theoretical best exposure, or standard exposure index. If the marker goes to the right, it indicates over-exposure (your picture is too bright); if it goes to the left, it indicates under-exposure (your picture is too dark).
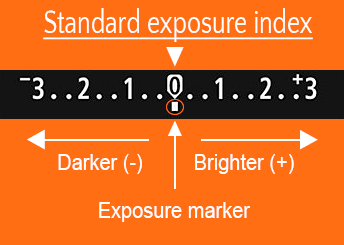
Exposure level indicator
What the light meter displays depends on the metering mode you use, and what metering modes you have at your disposal depends on the camera model you use. Some measure light only in a small portion of the frame (8% of it, or 1.5% of it), in the middle or around the focus point (Spot metering); some make an average of the whole scene, with or without giving more weight to the center of it (Center-weighted metering); some offer an intelligent measure based on a division of the frame in several sections, taking into account colour and where your focus point is, though the exact algorithm depends on the manufacturer (Matrix/Evaluative/Multi metering).
It’s the latter we are interested in. Spot metering might seem interesting to achieve proper exposure on the bird, but its accuracy greatly depends on the size and colours of the birds, and I’ve found that things happen and change so quickly in bird photography that Spot metering is not worth the trouble. Thus, I recommend Evaluative metering (or its equivalent in the brand you shoot with).
That doesn’t mean you should always place the light meter marker on "0"! What the camera considers as the "best exposure (the "0") is an image halfway between very bright and very dark ("middle grey"), which works fine for balanced scenes but not so much for extreme ones such as a snowy landscape (brighter than "middle grey") or a dark forest (darker than "middle grey").
Therefore, whatever metering mode you’re using, the result is only an indication that you should understand and take into account, but not follow blindly. Because Evaluative metering takes into account the whole frame, so should you. If you are photographing a small white bird in front of a dark background, the light meter’s "0" will bring neutral exposure to the dark areas, and the white bird, much brighter than the background, will be completely over-exposed, with no chance of recovering feather detail in post-production.
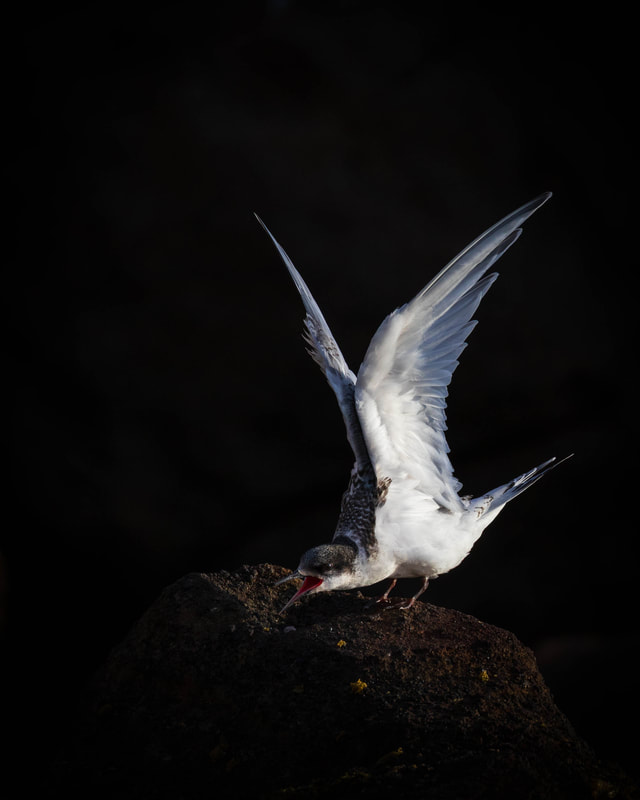
White-fronted tern - 1/1600s, f/6.3, ISO3200. I exposed for the bird to retain detail in its bright feathers, rendering the rest of the frame very dark.
What light meter result you need to work with to achieve your desired outcome is not always obvious, and you will need to experiment. Take test shots, check your images, and try again. With time and practice, you will learn what each situation requires.
Shooting modes
Besides the metering mode, the shooting mode is another important setting to choose.
In most situations, I recommend using Manual mode, for better control and consistency. In a given setting, the light a bird receives will be somewhat constant. However, the bird’s surroundings may rapidly change: think of a bird flying in front of the forest (dark background), then suddenly coming in front of a cloudy sky (bright background). If you use an automatic or a semi-automatic shooting mode, which chooses settings dynamically, based on the light meter results, exposure on the bird will not be consistent, and what might be a perfectly-exposed subject will become greatly over or under-exposed in front of a different background. If you stick to Manual mode, the bird will look exactly the same.
I like Manual mode, but if the light changes quickly, it can become a hindrance. I’m mostly thinking about shooting songbirds in the forest. If you are walking around, you may encounter darker places and brighter places; in addition, your targets are fast moving birds that don’t stay in place very long. If you use Manual mode in such a situation, you may not have time to change your settings every time you spot a bird. By the time you are ready, the subject will have moved to another branch, and you’ll have to start all over again. That’s where I like to use Aperture Priority mode, with auto ISO. You choose the aperture (in general, the widest possible, especially in a dark environment such as the woods), and the camera will determine shutter speed and ISO. Depending on your camera, you may be able to define boundaries, so that the shutter speed doesn’t go below 1/150s and the ISO doesn’t go over 3200, for instance (these are example values, they depend on the gear you use and your skill at using it).
Don’t think that this is the end of it though! As such, it would be very much like a completely automatic mode, but you can actually control your settings with exposure compensation. In other words, you tell your camera to expose for a certain light meter result, by moving the marker: -1 stop, -1/3, +1/3… This requires experience, because based on the conditions, you need to know what light meter result you want to use, and quickly (as we’ve seen, speed is paramount in this scenario). The big plus is that you only need to touch one dial to define your exposure.
Based on my experience, the danger in such a situation is to shoot at too-low shutter speed. In many cases, the camera will try to lower the ISO as much as possible, to preserve image quality, but that can result in shutter speeds I’m not really comfortable using… and since it all happens very quickly, it’s easy to miss it in the field; then you come home, and realize that all your pictures are blurred. If this happens, try to set a minimum shutter speed, set the ISO manually, or switch back to Manual mode.
Scarlet myzomela - 1/250s, f/5.6, ISO 400. Set on Aperture Priority mode, my camera preferred low ISO to high shutter speed, resulting in a suboptimal 1/250s shutter speed. I would have preferred ISO 1000 and 1/640s, it would have prevented motion blur much better (but I realized that only when I was at home).
CONTROL
Reflexes
With this, you have all the tools you need to nail your exposures in the field. Of course, you will miss shots (everyone does), but with practice, you’ll come to realize that, in a given situation, you already have an idea of what settings you will need:
“It’s overcast, but I’m in the open, so I will start at ISO 500.”
“I’m shooting against the sun, so I will expose at -2 stops to avoid blowing the highlights out.”
These habits help you get started faster. In addition, if action happens really quickly and you don’t have time to review your exposure, having all this knowledge available improves your odds of taking pictures that you can then use, rather than throw away because the exposure was a complete failure. There are so many things to think about (composition, focus…) that it’s a huge bonus if exposure naturally comes to you.
Exposing to the right
Beyond just getting “usable” shots, there are techniques that can help you achieve the best possible image quality. “Exposing to the right” (ETTR) is one of them.
In essence, the idea is to make the image as bright as possible, so you don’t have to brighten it in post-production, an action that usually creates noise, thus lowers image quality. “As bright as possible” means that you expose so that the brightest parts of the image just barely retain details; obviously, you still want to keep these details, so you don’t go further. As a result, darker parts of your image are also “as bright as possible”, reducing the need to brighten them.
To help you expose to the right, I warmly recommend enabling the overexposure warnings. That way, if you blow the highlights out, your camera will tell you when you review the images on the LCD screen (or directly when taking the images for mirrorless cameras). You then know that you should darken your image a bit.
BALANCE
Bird photography brings ever-changing conditions, and with them, plenty of decisions to make.
Blacks vs. Whites
Some birds sport high-contrast plumages, with very dark parts and very bright parts nexxt to each other. This is a challenge for the photographer, because if you expose for the whites, the blacks risk being too dark, while exposing for the blacks may blow the whites out. Therefore, photographing species such as the Tufted duck becomes a tricky balancing act, where knowing your camera well is crucial. One obvious strategy is exposing to the right, as described above. However, this extreme strategy can be dangerous, because of the possibility to lose detail in the white parts. In addition, it will require work in post-production to make sure the whites look bright enough, but not too much. One personal preference can be to expose a bit lower than ETTR, so that whites look natural straight out of camera. The downside is that you’ll have to brighten the darkest parts, but I find it easier to recover details there than in the brightest parts. However, it creates noise in your image, which is the reason why you need to know your camera well: you need to know how far you can go (how dark you can shoot), how much detail you can recover, how much noise you will create in post-production.
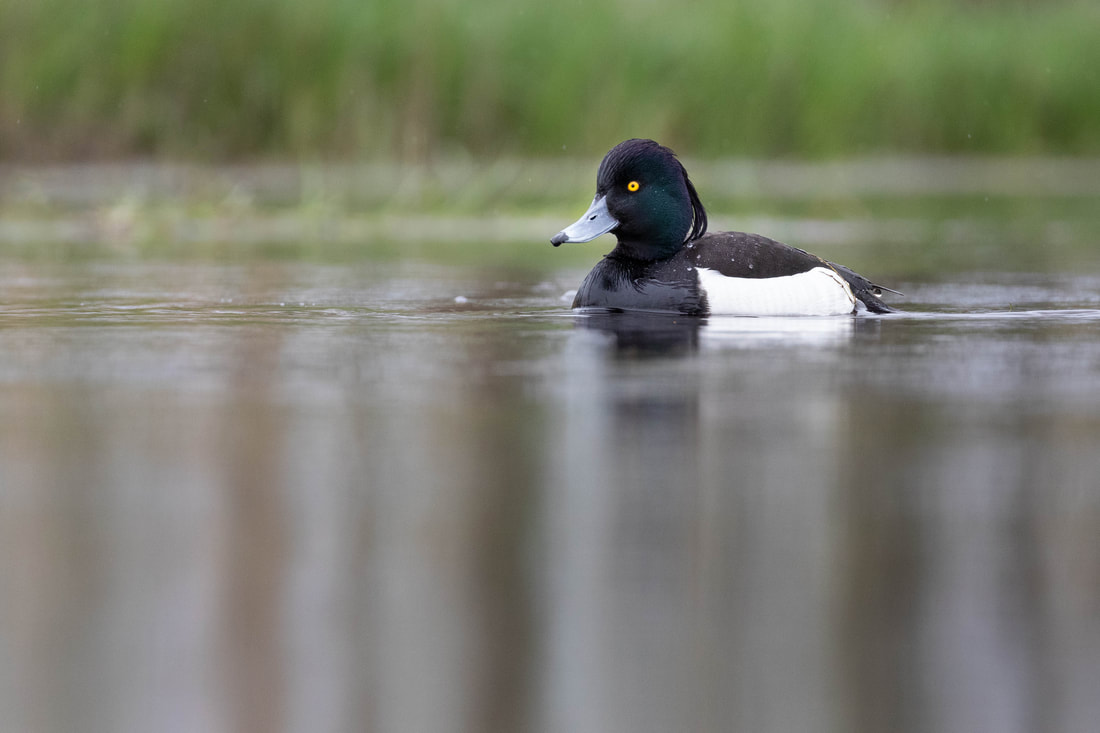
Tufted duck - 1/1600s, f/6.3, ISO 1250. Balancing whites and black can be tricky on these ducks, though it's easier on such an overcast day.
Note that this problem is more acute in direct sun light. In overcast conditions, it’s a lot easier to balance whites and blacks on your subject, because the brightest parts are significantly toned down.
Subject vs. Background
This situation involves high contrast not on the bird itself, but between the bird and its background. Usually, the bird is in shadow but the background (a hill, a reedbed...) is lit by the morning or evening sun. The problem is the same as in the previous section: how do I make the bird bright enough without blowing the background out? I think exposing to the right is great in such a situation, especially because you don’t need to retain detail in the background, as it will be blurred anyway. You just need to have colour data in it: recovering it in post-production will then be extremely easy. Unfortunately, your subject will likely remain way too dark, and will thus need to be brightened. As always, noise will be an issue, and a sensor with a wide dynamic range will be favoured.
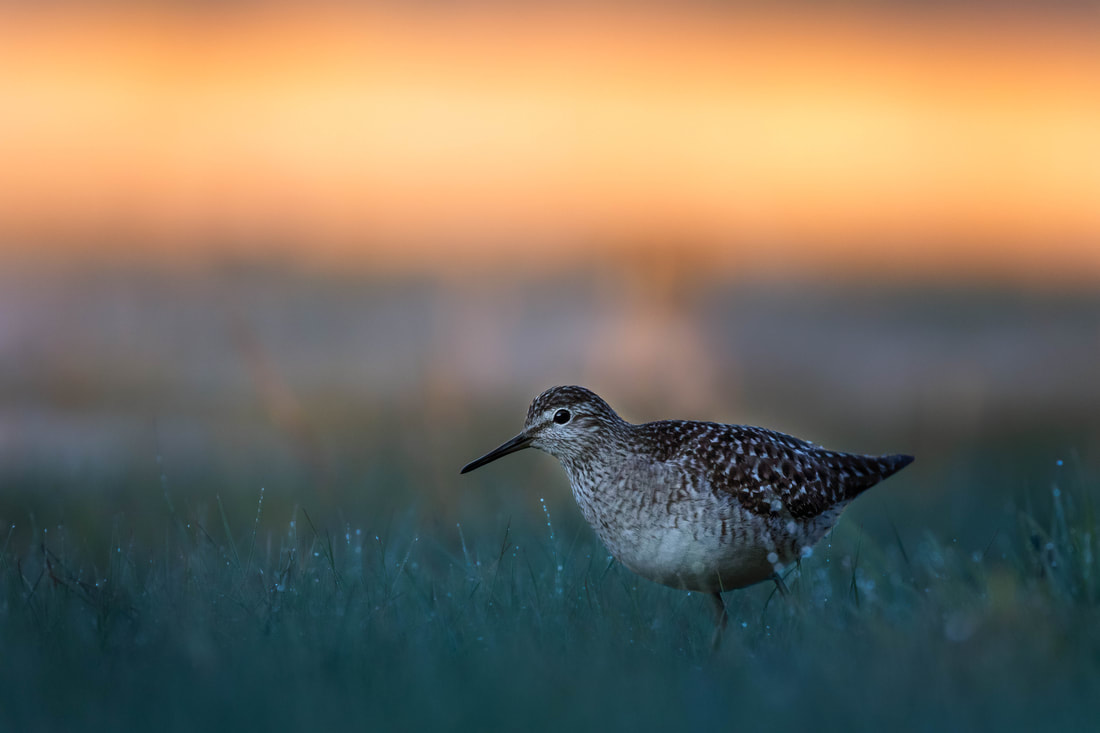
Wood sandpiper - 1/400s, f/6.3, ISO 1000. The background was lit by the morning sun while the bird remained in shade.
The opposite situation, a bird lit in front of background in shade, is a lot less problematic. It’s actually the perfect setup for low-key images! The secret is to expose for the bird, and embrace the black background that lets your subject shine. You can enhance such images (in the field and on the computer) by making sure there is no bright distracting element in the background, so that the viewer’s attention solely focuses on the bird.
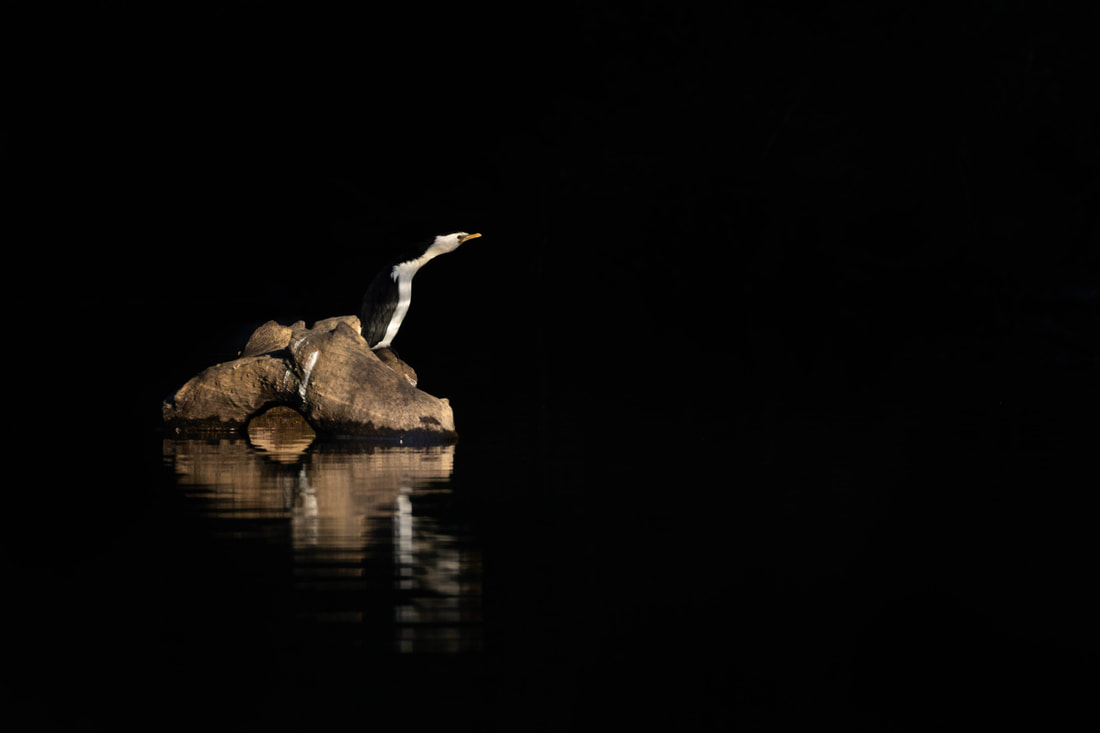
Little pied cormorant - 1/1250s, f/6.3, ISO 400. The bird was lit by a shaft of light while the forest behind was in shade.
Another style one can work with in high-contrast situations is of course silhouettes! In its most classic expression, a silhouette shot doesn’t care about detail on the bird, because it will be all dark in front of a bright background, often the sky. However, if the background is not very bright, some plumage patterns might start to appear on the bird. If you want to enhance them in post-production, you have to be wary of the noise you may bring up. As always, it’s a balancing game, and the image can go in either direction based on your desired outcome.
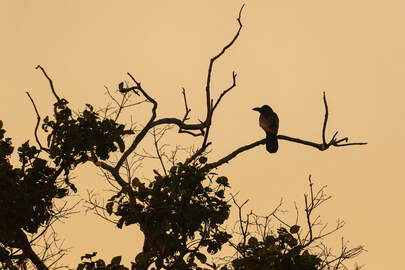
Indian jungle crow - 1/1000s, f/6.3, ISO 500. A classic silhouette shot.
|

Common goldeneyes - 1/800s, f/5.6, ISO 640. A silhouette shot with some plumage detail.
|
Action vs. ISO
One general advice, with regards to image quality, is to keep the ISO sensitivity as low as possible, to prevent excess noise. However, when shooting static or slow-moving birds, there is an important decision to make: do I choose settings that would allow me to freeze action (the bird preening or taking off, a fight with another birds etc), with higher shutter speed and therefore higher ISO, or should I stick to lower ISO for image quality, which forces me to use a lower shutter speed that wouldn’t be suitable for action shots (motion blur)? Usually, action happens too quickly to change settings.
I think it depends on the light and the birds (and your experience with them).
Sometimes, you know by looking at the birds that they are not going to move anytime soon, so you can safely keep a low shutter speed. Similarly, if it’s really dark, it may be valid to keep the ISO as low as possible and give up on action shots.
On the other hand, if the conditions are great, you might just as well plan for action…
Conclusion
So here it is, my blueprint for exposure in bird photography. I hope you enjoyed your read, and learnt a thing or two!
Please bear in mind that what I presented directly comes from my own experience in the field, with my gear. It’s likely you have different preferences, at least on some topics, because your style or your gear is different from mine… and that’s totally fine! The most important thing is that you find the techniques that work for you, the ones that allow you to reach your desired outcome. So try these tips, and if you like them, adopt them; if you don’t, well let me know how you do it, maybe I can learn from you as well!
Thank you very much for reading. If you’d like to stay in touch, please subscribe to my newsletter, a (soon to be) monthly email of pure goodness: trip reports, image explanations, videos, inspiration…
I also offer 1-on-1 tuition on post-production and image critique: we’ll connect online and I’ll be an open book for you, giving honest advice and explaining my techniques in as much detail as you want. Check this page for more details.
Thanks, and see you soon!
Samuel
All pictures are mine. Do not use without authorization.
